A badly packed set of webbing tells on you within the first mile. Pouches bounce, weight drags on one side, and the item you actually need ends up buried under something less important. If you want to know how to pack military webbing properly, the aim is simple - keep essential kit secure, balanced and immediately accessible without overloading yourself.
Why packing military webbing matters
Webbing is there to carry the fighting order and the items you may need quickly when your bergen is off your back or out of reach. That makes the layout more important than simple storage. A neat-looking set-up is not enough if it shifts when running, catches when going prone, or forces you to fumble for water, ammunition or first aid.
The right packing method depends on role, duration and the pattern of webbing you are using. British Forces-style PLCE webbing, belt kit and many modern modular systems follow the same basic rule: heavy items need to sit stable, frequently used items must be easy to reach, and nothing should interfere with movement, weapon handling or getting in and out of vehicles.
For cadets and new users, the mistake is often carrying too much. For experienced hands, the usual issue is hanging on to a layout that suited one task but not the current one. Webbing should match the job, not habit.
Start with the job, not the pouches
Before you decide what goes where, be clear about what the webbing is for. A short training serial, tabbing exercise, fieldcraft weekend or patrol all call for slightly different loads. If you are carrying a bergen as well, your webbing should support the essentials you need once that bergen comes off. If you are working light, the webbing may need to hold more sustainment kit.
This is where discipline matters. Pack for the most likely requirement, not every possible problem. Extra kit feels sensible in the car park and starts to feel foolish once the weight settles into your hips and lower back.
As a rule, think in three groups: immediate access items, sustainment items and admin items. Immediate access kit includes anything you may need in a hurry. Sustainment covers water, rations and similar field essentials. Admin items are useful, but not worth cluttering your prime pouch space.
How to pack military webbing for balance
If you are learning how to pack military webbing, balance is the first principle to get right. Uneven weight distribution will rub, twist the belt and make moving under load far more tiring than it needs to be.
Keep the heaviest items centred as far as practical around the rear side pouches rather than hanging too much weight off one hip. Water is usually the biggest factor here. If you carry two water bottles, split them evenly. If one side pouch is noticeably heavier than the other, you will feel it quickly on a long walk.
Avoid stacking bulky hard items where they dig into the kidneys or spine when wearing a bergen. Equally, do not overload the front so badly that going prone becomes awkward. There is always a trade-off between access and comfort. The best layout is the one that lets you move naturally while keeping the important items to hand.
Keep your front clear enough to work
A common British webbing principle is to leave enough space at the front of the belt to sit, kneel and go prone without fighting your own kit. If utility pouches are too far forward or overpacked, they can jam into the thighs and lower abdomen. That is not just uncomfortable. It slows you down.
Magazine pouches, if fitted, need to stay accessible without forcing an awkward draw. Utility pouches should sit where they do not obstruct movement. Yoke straps should support the weight without pulling the belt too high or letting it sag.
Pack by access speed
The next rule is straightforward: what you need fastest should be easiest to reach. That means water, ammunition, first aid, navigation aids and any role-specific essentials should not be buried under spare clothing, brew kit or random bits of admin.
Think about your non-dominant and dominant hand as well. If one pouch is easier to reach with your left hand, that may be the better home for a water bottle or field dressing, depending on how you work. There is no universal layout that suits everyone, but there is always a logic behind a good one.
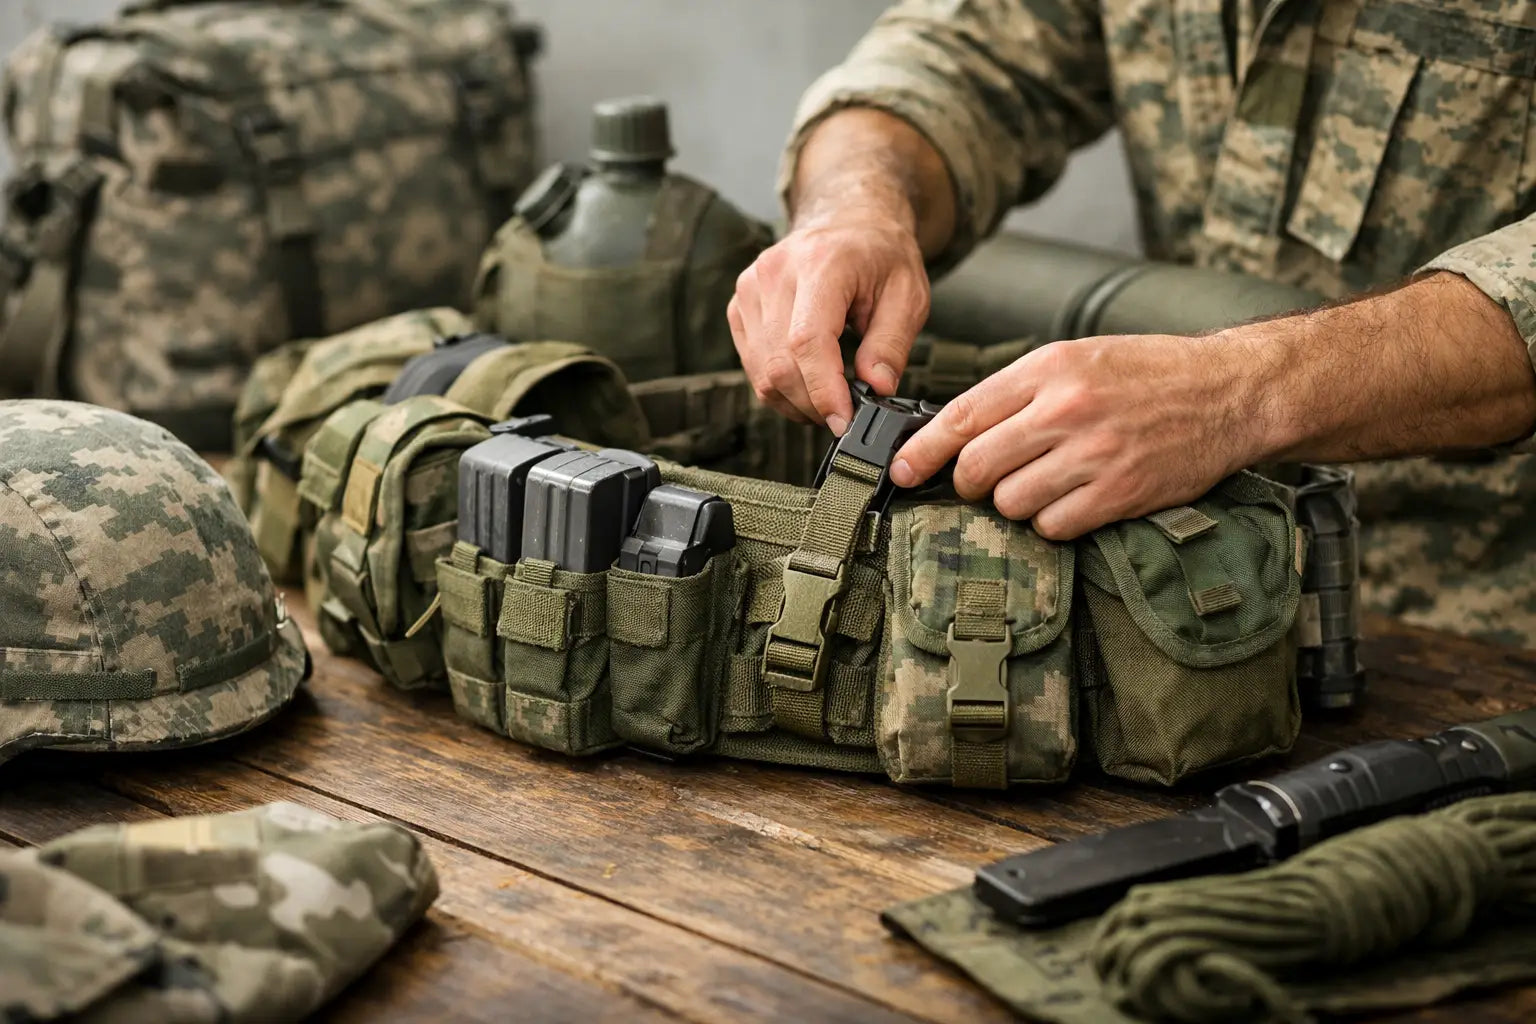
A practical pouch-by-pouch approach
Most British Forces-style webbing layouts revolve around ammunition pouches at the front or sides, utility pouches to the rear and a yoke to transfer weight onto the shoulders. Exact pouch names and sizes vary, but the function stays familiar.
Front pouches should hold the items with the highest need for immediate access. For some users that means magazines. For cadet or training use, it may mean gloves, notebook, torch or compact field items needed during a serial. Keep these pouches orderly. If you have to root around in them, they are too full.
Side or rear utility pouches are usually the best place for water bottles, rations, poncho, basha pegs, mess tins or stove components, depending on the task. Pack soft items around hard ones to reduce movement and noise. If you carry a metal mug or stove, stop it rattling. Noise discipline still matters in training, and it certainly matters elsewhere.
A small top section in a utility pouch often ends up as a dumping ground. Avoid that. Put admin items such as spare batteries, map pens, tape, hexamine or small repair kit in a pouch liner, dry bag or zip wallet so they stay grouped and easy to find.
Protect essentials from water and mud
Knowing how to pack military webbing properly also means protecting the contents, not just arranging them. Webbing gets wet, muddy and knocked about. Anything that must stay dry should have its own protection inside the pouch.
Maps, notebooks, spare socks, gloves, comms accessories and rations all benefit from waterproof packing. Do not rely on the outer pouch alone. A utility pouch may shrug off a shower, but prolonged rain and ground contact will test that confidence.
This is one area where overpacking causes problems. If pouches are crammed tight, flaps do not close cleanly, buckles strain and water finds its way in more easily. A properly packed pouch closes flat, stays quiet and opens without a fight.
Check movement, not just fit
Once packed, webbing needs testing under movement. Standing in front of a mirror tells you very little. Walk, jog, kneel, go prone, climb into a vehicle if relevant, and put a bergen on over the top. You are checking for hot spots, snag points and access issues.
Pay attention to what shifts. If a pouch swings or the belt rides up, the problem may be packing, positioning or adjustment of the yoke. Tightening everything is not always the answer. Sometimes the fix is redistributing weight so the system carries properly.
If you wear body armour or additional layers, test with those on too. A layout that works over a smock can become awkward with bulkier equipment. It depends on the task, but the principle stays the same - your webbing should work with the rest of your kit, not against it.
Common mistakes when packing military webbing
The biggest error is treating every pouch as usable space that must be filled. Empty space is not wasted if it improves access and comfort. Another mistake is putting all convenience items in the best positions while pushing genuine essentials into awkward places.
Poor balance is another regular problem, especially when one water bottle is replaced by loose odds and ends on the opposite side. That rarely weighs the same. The final common mistake is never revisiting the set-up after using it properly. Field use exposes weak layouts quickly. The smart approach is to adjust early, then keep refining.
What to carry and what to leave out
This always depends on the task, but the standard is easy enough to understand. Carry what supports immediate effectiveness and short-term sustainment. Leave out duplicated items, comfort extras you are unlikely to use, and anything better stored in a bergen.
For most users, webbing should not become a substitute for a daysack or bergen. If it is overloaded with spare clothing, oversized cooking kit and too much food, it loses its purpose. Better to run a clean, disciplined belt order that you can wear all day than a bloated one that becomes a nuisance after an hour.
For anyone building or replacing a set-up, good quality webbing and dependable pouches make this easier. A stable belt, properly cut yoke and solid pouch attachment points matter just as much as how you load them.
When you get it right, webbing stops being something you notice. That is the standard worth aiming for - kit that stays out of the way, keeps the essentials to hand and works as hard as the rest of your field equipment.